One of my hobbies is to build and mod distortion pedals. I really enjoy exploring how iconic guitar sounds are shaped just by varying a few electronic components. It's also surprisingly cheap once you know how to find cheap parts. Here are some of my tricks to get started modding and building.
1. Start by modding
It's easier to modify a pedal than to build one. I suggest starting with
reversible mods like these wah and diode clipping mods.
Behringer Hellbabe Wah mod
The Behringer Hellbabe (60$) is a cheap clone of the Dunlop Cry Baby from Hell (160$). One thing I didn't like about it is the course. When you press
down on it, the first part of the course does almost nothing to the sound and
the whole "wah" sound just happens on the very end of the movement. It appears
that this wah is optical and easy to hack with a simple utility knife, which
would not be possible with mechanical wah.

Picture from
TDPRI


The next one I'm building from PedalPCB is the Fuzz Foundry. The typical fuzz schematic is very simple but can be difficult to do right, especially when it requires germanium transistors which are hard to find and often unreliable. I also have the Omni Drive by John Hollis. This circuit has many toggles to try to mimic a great variety of sounds from a minimal number of components. Impressive piece of circuit design.
Perfboard x10: 6.99$
Potentiometers kit x30: 19.99$
Resistor kit x400: 10.19$
Capacitor kit x150: 17.99$
Gemanium diodes x10: 3.91$
Quad opamps TL074 x10: 1.24$
Opamps LM741 x10: 1.50$
Dual opamps TL072 x10: 0.99$ (9.99$ when not bought directly from China)
Total: 15.31$
Enclosure 1590B = standard: (11.1 x 6 x 3.1) = 5.96$
Enclosure 1590BB = double: (12 x 9.3 x 3.5) = 7.15$

A wah is mostly a hi-Q bandpass filter. This one works with an optocoupler:
the amount of light a photoresistor sees determines the frequency of the
filter. So if it sees less light, you get the "W" part of the "Wah", and
more light gives the "ah" sound.
The pedal moves a little panel with a triangular opening in it. This panel
hides or shows more light to the photoresistor. So if you change the shape
of that triangular window, you change the way the pedal movement will affect
the change in filtering.
Here's a video about how to do it.

Boss OS-2 clipping diodes
My experience is that changing the clipping diode is what has the most impact on the distortion/overdrive character. I bought a used Boss OS-2 for 20$. This pedal has in fact 2 separate circuits (hard and soft clipping) with a blend knob. It sounded like garbage though. When I opened it, I noticed that all the clipping diodes have been crippled. That's a typical amateur move to just remove them and let the opamp clip. I simply replaced them with a combination of LEDs and silicon. The variations I can get from that pedal is crazy.
Avoid surface-mount electronics as it is harder to mod. The very compact
pedals and the cheap Behringer clones (even though they are excellent
pedals) are often surface mount. Also, be aware that the very latest Boss
pedals are in fact digital. If you want to be safe, try to find the
schematics online and advice on forums. Otherwise, in every used pedal I
opened the clipping diodes were easy to identify and change. They are even
often conveniently labeled. Just look for a pair of diodes so you don't
confuse them with an eventual protection diode.
2. Expand pedals
Boss DS-1 and Tube Screamer mods
I wrote a separate article about modding the Boss DS-1. Here instead of just changing the clipping diodes, I added some toggle switches to make any combination of LEDs, germanium, silicon diodes or opamp clipping. I also changed the tone filter shape, the preamp boost and some capacitors to filter the sound.
I also wrote a separate
article about modding a cheap Tube Screamer clone.
I see it as the next stage of pedal modding: not just replacing some
components but actually adding more functionalities. Also, it's not just
about swapping internal components but modding the enclosure to expose more
settings. Let's now move on to more involved pedal building.
3. Build a kit
You can find plenty of kits to build your own pedal. I really like the
Stoning distortion kit. it doesn't come with an enclosure but I like to build my own anyway,
which I will write about in another article.

4. Design your own sound module
Using a Joyo pedal as a base
What I advise to do is to use a cheap pedal as the base so you don't have
to rebuild the boring stuff like 1/4 jack connector, bypass switch, 9v
connection, LED and filtering, etc. These Joyo pedals sound very good,
especially this Delux Crunch. I was pleased to discover that this line of
pedal all use the same base so different pedals only have different sound
modules attached to it with a 4 pins connector. So I desoldered the sound
module and attached a strip ribbon to it. Every pedal I build simply
connect to that Joyo base.

Simple circuits: Elektra
One of the fun parts of building pedals is hunting for schematics. Some
circuits are so simple that it's hard to believe that they can sound so
good. For example, here's one called Elektra.

|
| From this page |
If you are not comfortable reading schematics, you can find many perfboard
illustrations that you just have to replicate. Otherwise, there are some
nice kits
here
and
here.
For my version, I used
Easy EDA to model the
circuit and see if I could improve it.

My final version has a single gain knob going from clean to really saturated
in just around 8 components.


Typical opamp distortion: MXR Dist+
This circuit is a good starting point to learn about distortion (hard
clipping) and how to wire opamps. It's very easy to mod and is a template
used by most distortion pedals I know. Once you make a distortion, an
overdrive and a fuzz, and you understand the similarities and differences,
you see how most pedals are a variant of these 3 schemas, even the 1000$
pedals. This article
is an excellent explanation of that circuit and how to modify it.
I like to model my schematics using EasyEDA, but I use
Blackboard or
DIY-layout-creator
as simpler tools to layout my perfboard.

Other simple circuits
Here are other simple but impressive circuits that I have in various
phases on breadboards: Multistage jfet if you like amp-like distortions, Matsumin Valve Caster if you want a cheap way to get into tube circuits, Earthquaker Device Bellows for another amp-like distortion that is simple but very powerful.
Pre-made PCB
One good alternative if you don't want to design your perfboard or print
your own PCB is to buy one.
PedalPCB
as tons of very well made PCB for any type of pedal. You need to provide
your own electronic components though, they are not complete kits, just the
board. For this one I stayed very close to the original schematic, just
changed a few values and the clipping diodes.


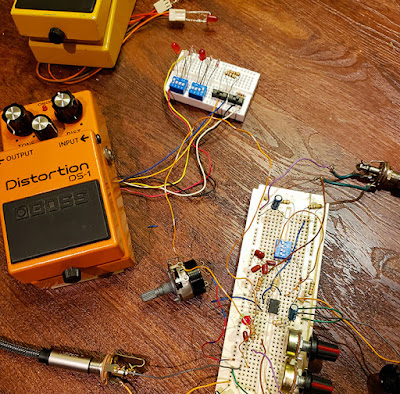
The next one I'm building from PedalPCB is the Fuzz Foundry. The typical fuzz schematic is very simple but can be difficult to do right, especially when it requires germanium transistors which are hard to find and often unreliable. I also have the Omni Drive by John Hollis. This circuit has many toggles to try to mimic a great variety of sounds from a minimal number of components. Impressive piece of circuit design.
I like how much resources you can get to build your own clone. For example,
I really like the Catalinbread sound. Here's an article about the
Catalinbread SFT and a
PCB for it.
5. Have your components ready
If you are building your pedal from scratch, you need to have some
basic components at hand. It can be very frustrating to just order the
exact list of components for your project and then wanting to modify it
and not have the right components. I had the basic equipment 20 years
ago when I started toying with analog electronics but I had no
components.
After much research, here's the cheapest bill of material I can
list (all costs in CAD).
Base electronics components
Breadboard x3: 12.99$Perfboard x10: 6.99$
Potentiometers kit x30: 19.99$
Resistor kit x400: 10.19$
Capacitor kit x150: 17.99$
Gemanium diodes x10: 3.91$
Quad opamps TL074 x10: 1.24$
Opamps LM741 x10: 1.50$
Dual opamps TL072 x10: 0.99$ (9.99$ when not bought directly from China)
Of course you need to add the basic tools required for electronics (pliers,
soldering iron and wire, multimeter). You can probably build more than 40
pedals with this kit (if you get more perfboards). That's less than 2$ a
pedal! Then you need to add the enclosure and fixtures.
dc socket: 1.40$
footswitch: 3.60$
enclosure: 5.96$
water slide decal: 1.35$
Enclosure
For 1 pedal
2 jack 1/4 sockets: 3$dc socket: 1.40$
footswitch: 3.60$
enclosure: 5.96$
water slide decal: 1.35$
Total: 15.31$
Enclosure 1590B = standard: (11.1 x 6 x 3.1) = 5.96$
Enclosure 1590BB = double: (12 x 9.3 x 3.5) = 7.15$
As you can see, the enclosure costs way more than the actual audio circuit.
You can even find
these parts in kit
for just 1$ more. But it's worth it. Here I printed a drawing from my
daughter on a waterslide decal to add on an aluminium enclosure that has
been primed.

Conclusion
Modding and building pedals are fun. My goal here was to show that it
doesn't have to be expensive. But if saving money is your goal, I found
excellent pedals for cheaper than that, like this impressive Suhr Riot clone for 11$. And they really do sound great. So why pay for expensive
pedals that most often are just glorified Tube Screamer clones? My opinion
is that when you buy a pedal you like, regardless of if you can build or buy
a clone, you also pay for the real thing, for these awesome creators that
are not just able to design impressive circuits but to manage a company, to
drive a whole industry, to make you dream and to inspire you. When I listen
to the folks at JHS,
Strymon,
Wampler,
EHX,
Death by Audio, I always feel like my pedal modding hobby is like I'm painting by number
and these people are like Bob Ross. Look inside their pedals, hear how they
sound, look at the design, it's the same circuit, why is it so much better?
That's their magic.
Buying pedals also encourages local creators. I'm from Montreal and we have
Johnny Rock Gear, Montreal Assembly,
Fairfield Circuitry,
Ground Control and
SolidGoldFx to name
just a few.
But before destroying a 300$ Wampler Triple Wreck I will practice on that
50$ clone. And building my
own circuits makes me appreciate what these creators are doing even more,
like playing music helps appreciate what musicians are creating. I also like
that my errors are something that you can't get on a professional pedal or
in digital emulations, that moment when the feedback loop makes it
oscillate, when a fuzz is starved and starts to sputter, when a JFET
explodes in smoke at the right moment. At the end of the day, it's fun to
watch clipping sine waves on an oscilloscope, but it's even more fun to see
how it brings your playing into unexplored territories.